Master the fundamental principles of soil reinforcement and avoid the problems associated with failed project inspections. This guide provides clear specifications and repeatable procedures to help you confidently install geogrids, ensuring your project remains stable for decades to come.
Typically, follow these steps: Prepare a level base → Lay the first grid layer → Install the drainage layer → Position the geogrid perpendicular to the wall (high-strength direction facing the slope) → Tension and secure with stakes → Backfill in layers → Compact per specifications → Repeat these steps every 2-3 layers (as per design requirements).
What Geogrid Does (and Why It Matters)
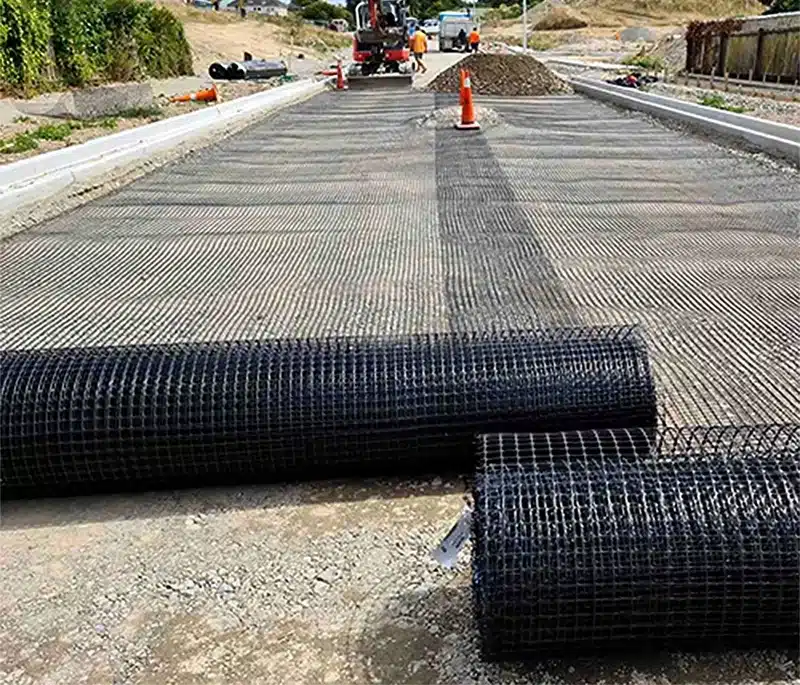
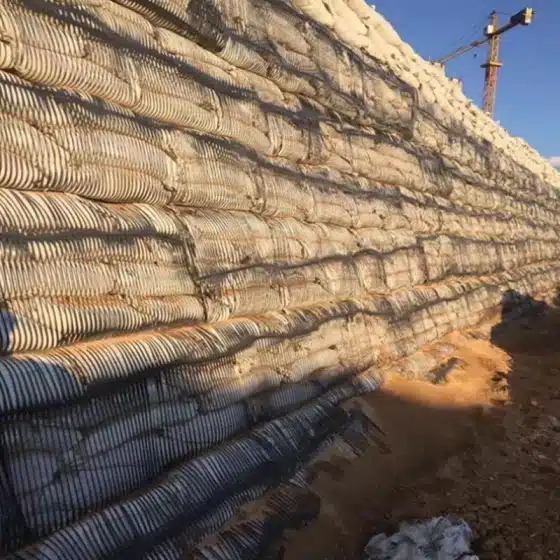
Geogrid is a high-tensile reinforcement that interlocks with compacted backfill. It turns the soil mass behind the facing into a single reinforced block. This reduces lateral earth pressure on the face, controls deformation, and increases wall capacity.
- For a geogrid retaining wall, grid layers extend back into the slope to form a reinforced soil zone.
- A geogrid mesh retaining wall uses geogrid with a welded-wire or block face; the principle is the same—soil + geogrid act together.
Concise & Modern (Best for Scannability)
Always prioritize the professional design plan. If you are working without a stamped engineering drawing, stop and consult a professional immediately. Before starting, confirm these key items:
- Wall height H, slope above, and any surcharge (traffic, structures, storage).
- Reinforcement length (L_r) per design (common ranges 0.7H–1.0H; never guess).
- Vertical spacing of geogrid layers (often every 2–3 block courses or 400–600 mm).
- Facing system and connection method (pins, friction tails, mechanical bars, wrap-around).
- Backfill type (prefer well-graded granular with <10% fines; avoid high-plasticity clays).
- Compaction spec (commonly ≥95% Standard Proctor; plate compact the near-face zone).
- Drainage plan (perforated pipe, free-draining aggregate, daylight outlet).
- Setback per course and embedment (typ. 1/10 of wall height or per design; frost considerations).
Tools & Materials Checklist
- Geogrid rolls (strength class and roll width per design)
- Facing blocks / welded wire forms / gabion or panel system
- Granular base and backfill, drainage aggregate
- Perforated pipe, geotextile sock (if specified), outlets
- Plate compactor + jumping jack (for tight zones)
- Screed, level, string lines, rebar stakes for grid tension
- Utility knife/shears, chalk line, pins/clips per system
- PPE: gloves, eye protection, safety boots
Step-by-Step: Geogrid Retaining Wall Installation
1) Excavate, Proof, and Prepare the Base
- Excavate to plan, including embedment at the toe.
- Proof-roll subgrade; undercut soft spots and replace with compacted granular.
- Place and compact the leveling pad/base (crushed stone or lean concrete as specified).
- Check line, level, and batter. Small errors here grow with height.
2) Place the First Courses of Facing
- Set the first course of blocks or the base row of wire forms perfectly level.
- Backfill and compact inside the cores (for blocks) and behind the face to the first geogrid elevation.
- Install drainage pipe behind the first course with outlet to daylight or storm system.
3) Install the First Geogrid Layer
- Clean the top of the facing course.
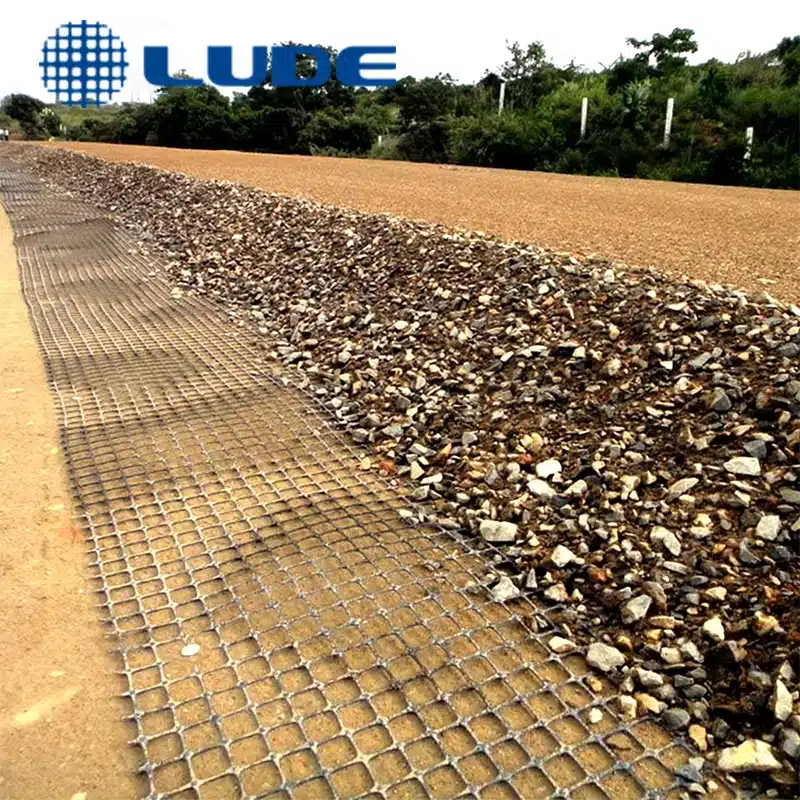
- Orientation: roll geogrid perpendicular to the wall so the strong direction goes back into the slope.
- Seat the geogrid on the block tail / connector seat. Pin or lock as the system requires.
- Pull the geogrid taut away from the face; remove wrinkles. Stake at the back edge.
- Overlap: side-by-side panels typically overlap 150–300 mm across roll widths. Do not overlap in the primary strength direction unless the design specifies.
- Avoid traffic on exposed geogrid. If equipment must cross, place ≥150 mm of fill first.
4) Backfill and Compact
- Place backfill in thin lifts (150–200 mm). Keep free-draining aggregate within 300 mm of the wall face if specified.
- Compact each lift to the design density. Use a plate compactor near the face; keep heavy rollers ≥0.9–1.2 m behind the face.
- Do not push soil sideways across the geogrid; place and compact from the back toward the face.
5) Repeat Grid Layers at the Specified Spacing
- Brush the surface clean, set the next course(s) of facing, check batter and line.
- Install the next geogrid layer exactly like the first. Stagger panel seams where possible.
- Keep drainage stone vertical and continuous behind the face.
6) Finish, Cap, and Surface Drain
- Cap the wall per the system details.
- Grade the surface to shed water away from the wall.
- Install swales or surface drains to keep runoff off the wall.
Special Cases
Curves and Corners
- For inside curves, cut fan-shaped pieces so all geogrid strips remain perpendicular to the face.
- For outside curves, avoid bunching. Overlap only across roll widths; maintain tension.
Stepped or Terraced Walls
- Each terrace needs its own global stability check.
- Maintain minimum horizontal separation between tiers per design (often ≥0.7H of lower wall).
Geogrid Mesh Retaining Wall (Welded-Wire Forms)
- Assemble wire forms level; secure front-to-rear ties.
- Wrap geogrid through the form or lock with cross bars per the system detail.
- Use temporary bracing until backfill and compaction lock the geometry.
Typical Parameters: Quick Reference (Not a Design)
| Item | Typical value (guide only) |
|---|---|
| Reinforcement length (L_r) | 0.7H – 1.0H (longer with surcharges/poor soils) |
| Vertical spacing | Every 2–3 courses (≈ 400–600 mm) |
| Backfill lifts | 150–200 mm per pass |
| Compaction | ≥95% Std. Proctor (check spec) |
| Near-face compaction | Plate compactor only |
| Equipment offset | ≥0.9–1.2 m from face |
| Side overlap (across width) | 150–300 mm |
Always supersede these with the engineer’s drawings and local codes.
Material Selection: Getting “Grid” Right
- Strength class: wide-width tensile and junction strength must meet design. For segmental block systems, check the connection strength with your specific block.
- Aperture size vs aggregate: choose a geogrid that interlocks with your backfill gradation.
- Polymer: PET for higher modulus and controlled creep in some cases; PP for chemical resistance and low density. Match chemistry to soil and leachate risks.
- Roll width planning: choose widths that minimize seams and waste.
- Documentation: ask for mill certs, lot labels, and third-party tests. This speeds inspection.
Do / Don’t Checklist
Do
- Keep geogrid perpendicular to the wall in its strong direction.
- Tension and stake geogrid before backfill.
- Use clean, well-graded granular backfill; keep fines low.
- Maintain continuous drainage to daylight.
- Verify each lift’s compaction and face alignment.
Don’t
- Drive equipment directly on exposed geogrid.
- Drag backfill across geogrid; it creates wrinkles.
- Substitute “geotextile fabric” for geogrid in reinforced zones.
- Ignore surcharges, slopes, or water—these change the design.
- Skip documentation; inspectors will ask.
Troubleshooting
- Face bulges: under-compaction in near-face zone or geogrid not fully tensioned. Re-compact and correct on next lifts.
- Rutting behind face: lifts too thick or wet; reduce lift thickness and improve drainage.
- Poor connection strength: wrong block–grid combination; use the tested connector set.
- Water at base: add weep outlets, check pipe fall, keep fines out of drain stone.
FAQ
What is geogrid?
A polymer reinforcement grid that interlocks with soil to increase shear resistance and form a reinforced soil mass.
How does a geogrid retaining wall work?
It uses layers of geogrid tied to a facing. Each layer extends back into compacted fill, creating a stable block that resists earth pressure.
Is “geogrid fabric for retaining walls” the same as geogrid?
The phrase is common online, but geogrid is a grid, not a fabric. Do not replace geogrid with geotextile fabric in reinforced zones unless the design allows.
What is a geogrid mesh retaining wall?
A retaining system that pairs geogrid with a mesh or welded-wire face. Installation steps mirror block walls, but connections are mechanical wraps/bars instead of block pins.
How far back should geogrid extend?
Per design. Many walls use 0.7H–1.0H; longer for surcharges, poor soils, or slopes above the wall.
Conclusion
Choose a specialized geogrid factory partner. You get factory-direct geogrid—uniaxial or biaxial, PP or PET—engineered for roads, platforms, and retaining walls, with competitive pricing, consistent quality, and reliable lead times. MJY Geosynthetics Manufacturer has been dedicated to producing high-quality geosynthetic materials for 15 years and is a recognized leader in the industry. If you are interested in finding a reliable one-stop geosynthetics supplier for your project or business, please visit our website for more information.