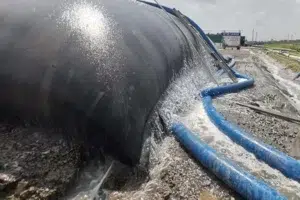
A pond can lose water through one poorly detailed pipe entry even when the surrounding liner and field seams pass inspection.
A reliable HDPE liner pipe penetration needs a project-designed transition between sheet, boot or collar, pipe and rigid structure. Check differential movement, weldability, flange compression, substrate preparation and access for testing before choosing parts. Neither liner thickness nor a good field-seam result proves the penetration is watertight.
The important question is not simply which boot to buy. It is how every material and movement path will be controlled after backfill and operation begin.
Send your project drawings, technical specifications, quantities and destination for material-fit review before quotation.
Send drawings and specificationsWhere Does a Pipe Entry Usually Fail?
The weak point is often the change from a flexible membrane to a pipe, concrete wall or metal flange. Pipe settlement can pull on a tight boot; an unsupported collar can wrinkle; a compression seal can lose effectiveness when its surface is irregular. The project drawing should show the pipe outside diameter, material, elevation, wall geometry and expected movement. A contractor also needs room for welding, torque checks and inspection. If that space is absent, a theoretically sound detail becomes difficult to build. Do not hide the connection beneath protective soil until the inspection hold point has been signed off. [1]
Boot, Clamp or Mechanical Attachment: Which Detail Fits?
A fabricated boot can suit a compatible pipe and sheet when its geometry permits continuous welding. A clamped or mechanically attached connection may be needed at a rigid structure or incompatible pipe, but it brings gasket, backing plate, fastener and corrosion decisions. ASTM D6497/D6497M describes objectives and common problems for mechanical attachment; it is a guide, not a universal drawing for every penetration. The designer should identify the sealing system and allowable movement. When two bids use different attachment concepts, ask each bidder to mark the exact materials and interfaces on the same drawing before comparing price. [1]
| Check | What it tells you | What it does not prove |
|---|---|---|
| Thermo-fusion boot weld | ASTM D6392 seam coupon | Does not prove pipe-to-wall seal |
| Mechanical attachment | ASTM D6497/D6497M design guide | Does not prescribe one universal gasket |
| Finished penetration | Project-specific inspection and leak test | Must be accessible before cover |
The comparison is a procurement screen, not a replacement for the approved engineering design. A test method defines how a property is measured; acceptance thresholds and the site detail must come from the project specification.
What Can the Test Report Actually Prove?
ASTM D6392 evaluates specimens cut from thermo-fusion seams in shear and peel. That information is useful for a welded boot joint, but it does not automatically verify a gasket under a flange or a pipe-to-wall seal. The construction quality plan should distinguish destructive seam sampling from the non-destructive checks specified for the finished penetration. Record the test method, location, acceptance criterion, repairs and retest. A supplier can provide compatible sheet and fabrication information; the installer and project engineer still need to approve a testable connection detail. [2] [3]
What Should Procurement Freeze Before Fabrication?
Send a marked-up penetration schedule rather than a count of pipe boots. Include pipe outside diameter and tolerance, pipe material, wall or slope section, liner grade and thickness, surface type, expected displacement, process liquid and available weld access. Ask who supplies the boot, gasket, flange hardware and corrosion protection. Confirm whether factory prefabrication changes packing or site welding. The cheapest boot can be expensive when an installer must improvise a transition after the liner is already anchored. Freeze the drawing revision before ordering custom components, and identify a field change process for unavoidable deviations. [1]
What Should the Site Team Verify Before Work Starts?
At the pre-installation meeting, walk through one penetration from liner approach to the far side of the wall. Decide who prepares the concrete or pipe surface, who supplies the gasket, who welds the collar, who records clamp torque and who signs the finished detail. Put those responsibilities on a marked drawing. If the pipe is expected to settle independently of the embankment, ask the designer where that displacement will be absorbed. Check whether a protective layer can be placed without loading the boot. The contractor should photograph the joint before and after testing, then protect it from later trades. These steps cost little compared with reopening a filled pond to trace one leak.
What Should Be in the RFQ?
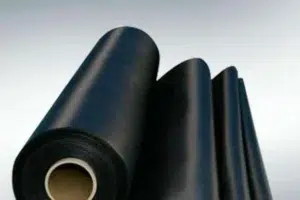
Provide the penetration drawing, pipe schedule, liner thickness and resin, chemical exposure, boot quantity, required hardware, access constraints, project test plan, delivery port and installation sequence. Request a bill of materials and a sketch of the proposed detail with the quotation. For the main sheet, review the HDPE geomembrane liner options and ask MJY to check material compatibility; final attachment design remains with the project engineer.
For the connected design check, review our geomembrane leak-testing methods guide before approving a material substitution.
For a fair quotation, ask each supplier to state the proposed grade, tested properties, test edition, usable roll dimensions, packaging, batch identification, lead time and exclusions. Put the drawing revision and destination on the inquiry. If a proposed substitute changes an engineered detail, request written design approval rather than treating it as a price-only decision.
Factory Tip and Buyer Check
Factory Tip: A photo of the pipe beside a ruler is not a fabrication drawing. Outside diameter, ovality and the finished pipe coating all affect the fit. Ask the installer to confirm the as-built dimensions before custom boots are made; reserve room for a repair weld if the first pass is rejected.
Before bulk production, compare the labelled sample or approved data sheet against the purchase specification. At goods receipt, keep roll IDs and packaging photographs. These small controls make a later site question traceable instead of turning it into an argument about what was ordered.
FAQs
Can the same boot fit any pipe?
No. Pipe diameter, material, geometry, exposure and movement can change the detail.
Does a passed seam coupon prove the penetration is leak-free?
No. It tests the sampled weld, not every sealing interface.
When should the detail be inspected?
Before cover or backfill removes access, at the hold point in the approved quality plan.
Conclusion
A penetration is a small area with disproportionate containment risk. Send MJY the pipe schedule, marked drawings and technical specification for a material and fabrication review, then have the project designer approve the final attachment and test plan.