How to Install Geogrid: Uniaxial vs Biaxial vs Triaxial
Want a base that doesn’t rut, a slope that doesn’t slip, and a wall that stays put? Geogrid makes that happen. This guide shows you how to install geogrid correctly and when to choose uniaxial, biaxial, or triaxial products—so your roadways, yards, and geogrid retaining wall builds perform like they should.
What are the differences between monoaxial geogrids and triaxial geogrids?
Quick definitions (so you choose fast):
- Monoaxial = Uniaxial geogrid. High strength in one direction (machine direction). You use it when loads pull primarily away from a face—think retaining walls geogrid layers and steep slopes.
- Triaxial geogrid. Strength and stiffness disperse through three principal axes. You use it to improve bearing capacity and reduce rutting under multi-directional traffic—think yards, haul roads, yards, and granular bases.
How they compare in practice:
- Uniaxial geogrid: Longitudinal ribs, high tensile strength and creep resistance in one direction → ideal for geogrid retaining wall reinforcement and reinforced embankments (long pulls, predictable direction).
- Biaxial geogrid: Balanced strength in two directions → great for subbase stabilization under pavements where traffic disperses laterally and longitudinally.
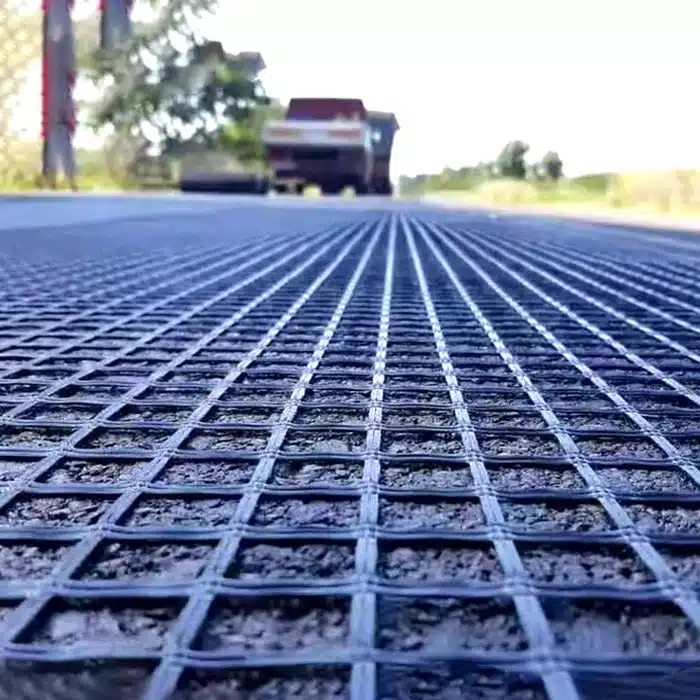
- Triaxial geogrid: Triangular aperture geometry → superior confinement and load spread under turning, braking, and point loads; excellent for soft subgrades and highly trafficked pads.
Selection rule of thumb:
- Walls & steepened slopes → uniaxial geogrid (monoaxial).
- Driveways, parking, general road base → biaxial geogrid.
- Difficult soils, frequent turning/parking, heavy-duty bases → triaxial geogrid.
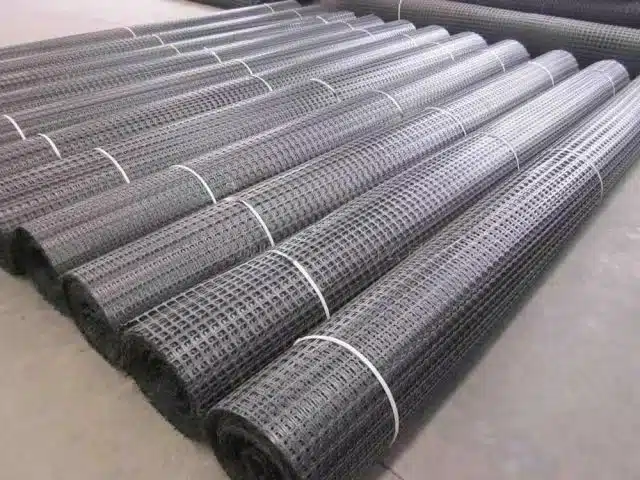
Tools & materials you’ll need
Hand tools: tape, string line, utility knife, chalk, shovels, rakes.
Compaction: plate compactor or roller; hand tamper for edges.
Anchoring & joining: pins/rebar, pneumatic stapler or zip-ties (as specified), edge restraints/curbs.
Layers: separation/filter geotextile (when soils are fine or pump), selected aggregate (well-graded crushed stone is typical).
Step-By-Step: How To Install Geogrid
1) Subgrade prep
- Strip organics and soft pockets. Proof-roll and rework weak spots.
- Grade to line and level. Target a firm, uniform platform (no pumping).
- Place geotextile separator if design calls for it (fine soils, wet subgrades).
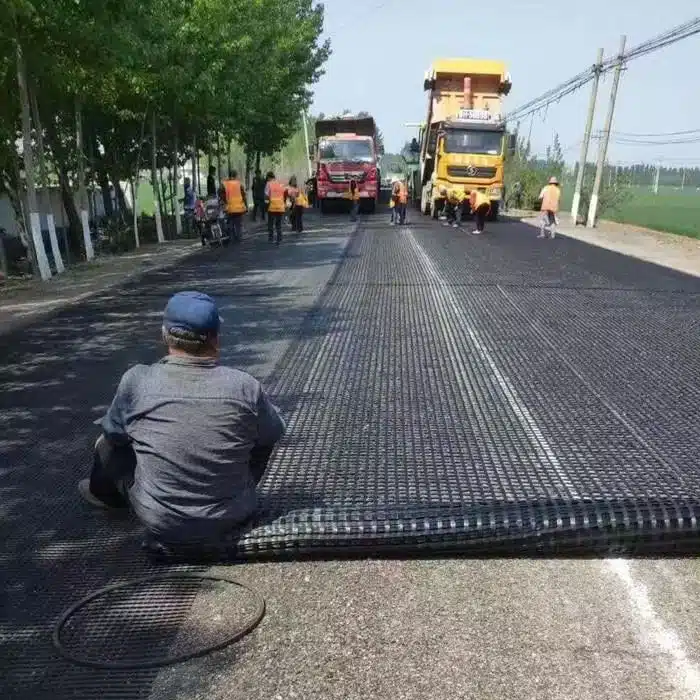
2) Roll out & orient geogrid
- Uniaxial geogrid: align the strong direction perpendicular to the wall face or direction of pull (check the arrow on the roll).
- Biaxial / triaxial geogrid: lay flat, apertures open and untensioned; follow specified lap direction.
- Lap adjacent rolls per spec (commonly 12–24 in / 300–600 mm) or use approved connectors where required. Pin laps on soft or sloped ground.
3) Anchor & restrain edges
- Use pins at corners, overlaps, and per grid spacing (e.g., 1–2 m centers unless otherwise designed).
- Install temporary edge restraints so geogrid stays flat during backfill.
4) Place and compact aggregate
- Place the first lift of aggregate carefully (avoid wrinkling or rolling the grid).
- Compact in thin lifts to the specified density. Avoid sharp turns on the first lift.
- Repeat lifts until you hit design thickness. Maintain smooth, even compaction near edges and structures.
5) QA checks
- Verify orientation (critical for uniaxial geogrid).
- Confirm lap/connection, pin density, lift thickness, and compaction results.
- Keep geogrid covered—don’t leave exposed to traffic or prolonged UV.
Use-Case Playbook
A)
Geogrid for hillside
- Grid choice: uniaxial geogrid in wrapped layers or with facing; biaxial/triaxial for veneer stabilization over soft ground.
- Build notes: step/bench the slope, layer geogrid at designed elevations, use well-graded, compactable backfill, and manage drainage (toe drain + surface water cut-off).
B)
Driveways & road bases
- Grid choice: biaxial geogrid for most residential/municipal bases; triaxial geogrid for weak soils, tight turning, or heavy vehicles.
- Build notes: geotextile separator on fines; keep lifts thin; edge restraint prevents lateral spread and protects the finished surface.
C)
Geogrid retaining wall
- Grid choice: uniaxial geogrid matched to design strength and creep class.
- Build notes: orient strong direction perpendicular to the wall face; embed lengths as designed (often 60–80% of wall height varies by design); strict layer elevation and compaction control. “Retaining walls geogrid” performance depends on drainage—add chimney drain and heel drainage as specified.
Common mistakes to avoid
- Wrong orientation: installing uniaxial geogrid with the weak direction facing the load.
- Inadequate laps/pins: leads to shear planes at roll joints.
- Thick lifts/poor compaction: settlement and rutting show up later.
- Driving directly on exposed geogrid: pushes, tears, and wrinkles the grid—always cover first.
- Ignoring water: no underdrain or surface runoff control shortens life and performance.
Conclusion
You install geogrid to move loads out and down—not straight through. Pick uniaxial geogrid for walls and steep slopes, biaxial geogrid for typical bases, and triaxial geogrid when loads arrive from every angle or soils are marginal. With clean subgrade, correct orientation, proper laps/pinning, and thin-lift compaction, your geogrid system will deliver a stiffer base, safer geogrid retaining wall, and a hillside that holds its line for years.