Laying pond liner looks like a simple site job, but many pond leaks come from poor base preparation, weak seam control, sharp stones, bad edge anchoring, or wrong filling sequence. For contractors, distributors, and project buyers, pond liner installation should be treated as a containment system, not only a sheet placement task.
To lay pond liner, prepare and compact the pond base, remove sharp objects, add geotextile protection if needed, position the liner without overstretching, overlap and seam the panels correctly, anchor the liner edges, inspect the seams, protect the liner, and fill the pond slowly while checking for wrinkles, movement, and leaks.

If you are learning how to make a pond with pond liner, the key is to plan the base, liner layout, seams, edge fixing, and protection layer before the material arrives. Installing a pond liner is not difficult in principle, but each step affects long-term water retention.
Site Preparation Before Laying Pond Liner
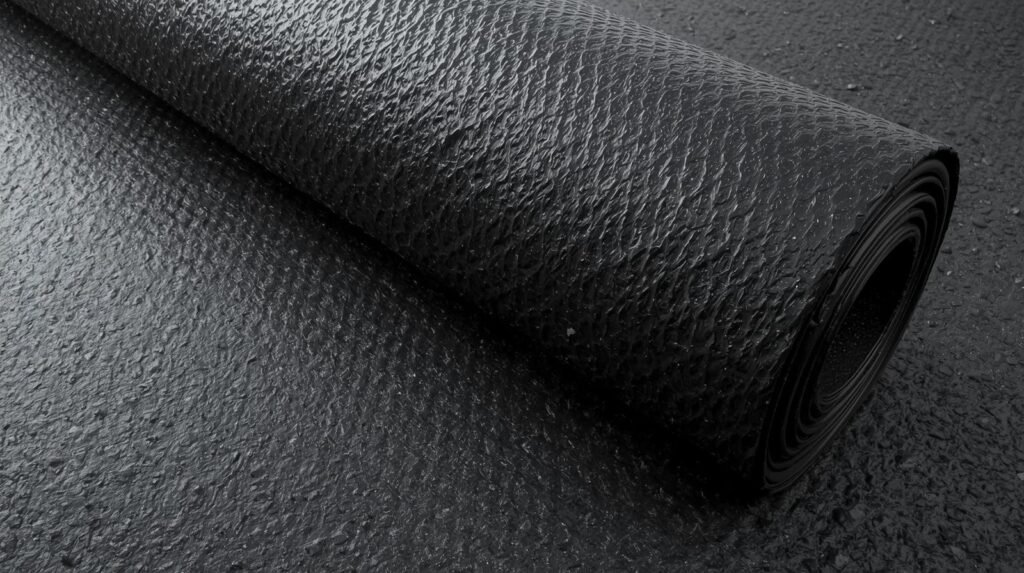
A pond liner usually fails from below before it fails from above. Sharp stones, roots, soft soil, poor compaction, and standing water can damage the liner even when the material quality is good.
Before laying pond liner, the pond base should be shaped, cleaned, compacted, and inspected. The surface should be free from sharp stones, roots, debris, soft pockets, and standing water. A geotextile underlayer should be used when the soil is rough, rocky, or uneven.
Professional Explanation
A pond liner is an impermeable geomembrane used to retain liquids in ponds, reservoirs, retention basins, surface impoundments, garden ponds, and artificial streams. It also needs protection from sharp objects below the liner and puncture risks from inside the water body. [1]
From a factory-side view, this means the liner is only one part of the system. If the foundation is poor, the liner can be punctured, stretched, wrinkled, or stressed after water filling.
For engineering projects, HDPE and LLDPE geomembranes are common choices. HDPE is often used when chemical resistance, UV resistance, and long-term durability matter. LLDPE may be selected when flexibility and fitting around irregular shapes are more important. The right choice depends on pond size, water depth, exposure, soil condition, and project use.
Construction Details
Start by shaping the pond according to the design. The base should have smooth transitions, stable side slopes, and no sudden sharp corners. If the pond has shelves, steps, or irregular curves, each transition should be rounded enough to reduce liner stress.
Remove roots, stones, metal scraps, hard soil clods, and construction debris. Then compact the base. If the soil is very soft, unstable, or wet, repair weak areas before putting in a pond liner.
For commercial ponds, aquaculture ponds, wastewater ponds, or irrigation ponds, a nonwoven geotextile protection layer is often placed below the liner. This reduces puncture risk and helps the liner sit on a more forgiving surface.
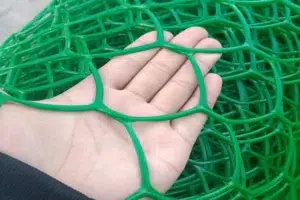
Buyers can review suitable geotextile materials when the project needs puncture protection, separation, or cushion support.
| Site Condition | Risk When Laying Pond Liner | Better Site Preparation |
|---|---|---|
| Sharp stones | Liner puncture | Remove stones and add geotextile |
| Tree roots | Puncture and uplift | Cut roots and compact surface |
| Soft pockets | Settlement and wrinkles | Replace or compact weak soil |
| Standing water | Liner floating or movement | Drain and stabilize base |
| Steep side slope | Liner sliding | Use proper slope and anchor trench |
| Rough subgrade | Abrasion under liner | Use cushion geotextile |
Selection Table
| Pond Type | Preparation Priority | Buyer Checkpoint |
|---|---|---|
| Garden pond | Shape control and smooth base | Avoid sharp shelves and hard corners |
| Fish pond | Smooth bottom and safe liner contact | Use protective geotextile where needed |
| Irrigation pond | Stable slope and water depth | Confirm anchor trench and liner thickness |
| Wastewater pond | Chemical exposure and seam control | Confirm HDPE grade and welding plan |
| Reservoir | Large-area subgrade stability | Confirm panel layout and installation crew |
| Aquaculture pond | Durability and cleaning | Use smooth liner and stable base |
Fitting a Pond Liner and Panel Layout

Fitting a pond liner is not only about covering the hole. The liner must follow the pond shape without being stretched too tightly, and the seams must be positioned where welding and inspection are practical.
Fitting a pond liner requires measuring the pond correctly, allowing extra material for side slopes and anchor trenches, placing the liner without dragging it over sharp surfaces, leaving enough slack for settlement, and planning panel overlaps before welding or seaming.
Professional Explanation
Geomembranes are very low permeability synthetic membrane liners or barriers used to control fluid or gas migration in human-made projects, structures, or systems. [2] In pond projects, this low permeability function only works when the liner is placed, joined, and anchored correctly.
For small decorative ponds, fitting a pond liner may involve one flexible sheet. For large commercial ponds, several geomembrane panels may be seamed together on site. In both cases, layout matters.
A poor layout can create too many seams, difficult welding areas, excessive wrinkles, or stress at corners and slopes. A good layout reduces seam length, improves installation speed, and makes quality inspection easier.
Construction Details
Measure the maximum pond length, width, and depth. Include side slopes, shelves, freeboard, and edge anchoring. For large projects, the layout should be drawn before delivery so roll direction, seam position, and installation sequence are clear.
When laying pond liner, do not pull it tight like a fabric cover. The liner should have enough slack to settle into the pond shape when water is added. If it is too tight, water pressure can create stress at corners, slopes, and anchor points.
For HDPE or LLDPE geomembrane panels, overlap must be allowed for welding. The overlap width should follow the welding method, project requirement, and installer practice. The seam area should stay clean and dry.
Buyers sourcing commercial pond liner can review geomembrane liner products before choosing thickness, width, roll length, and surface type.
| Layout Point | Why It Matters | Buyer / Contractor Check |
|---|---|---|
| Pond measurement | Controls liner size | Include depth, slopes, and anchor trench |
| Panel direction | Controls seam positions | Plan before unloading rolls |
| Liner slack | Reduces tension during filling | Do not overstretch liner |
| Overlap width | Supports welding quality | Follow project and machine requirement |
| Corner fitting | Reduces stress concentration | Avoid sharp folds and hard pulling |
| Anchor trench allowance | Secures edges | Add enough liner beyond pond edge |
Selection Table
| Project Condition | Fitting Priority | Better Decision |
|---|---|---|
| Small garden pond | One-piece fitting and clean edges | Use flexible liner and smooth base |
| Large irrigation pond | Panel layout and seam reduction | Use planned roll layout |
| Steep side slope | Slack and edge anchoring | Avoid tight placement |
| Irregular shape | Wrinkle control | Use careful cutting and fitting |
| Exposed liner | UV and thermal movement | Use UV-resistant material |
| Industrial pond | Seam access and inspection | Keep seams testable |
Installing a Pond Liner Step by Step
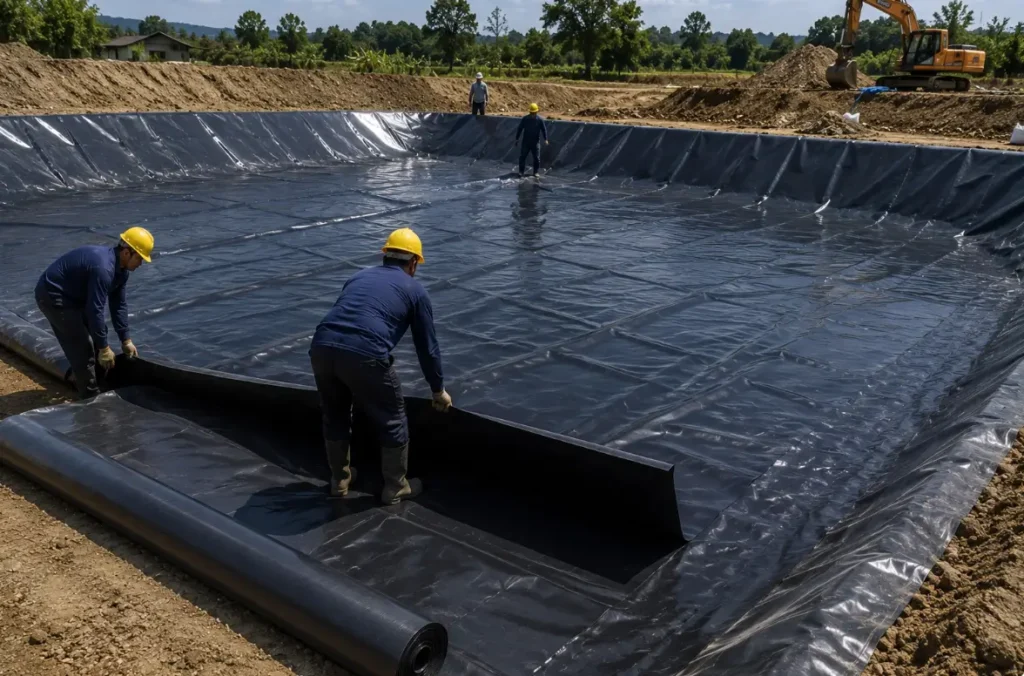
Installing a pond liner should follow a controlled sequence. If workers place the liner before the base, seams, and anchor trench are ready, the installation can become slow and risky.
The basic process for installing a pond liner is: prepare the pond base, install geotextile protection if needed, unfold and position the liner, allow overlap, weld or seam the panels, secure the liner in an anchor trench, inspect all seams, add protection if required, and fill the pond gradually.
Professional Explanation
When contractors ask about laying pond liner, they often focus on the liner sheet. The better way is to think through the whole sequence.
Putting in a pond liner too early can expose the liner to traffic, wind, dust, and unnecessary handling. Putting it in too late can delay welding and inspection. The installation schedule should match weather, crew availability, equipment, and liner delivery.
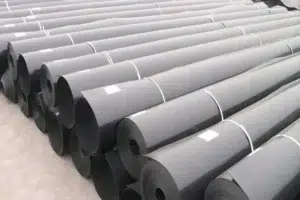
Pond liners are commonly manufactured in rolls or folded on pallets. When deployed in the field, their edges and ends are overlapped and seamed together by methods such as thermal fusion, solvents, adhesives, or tapes, depending on material type and project requirement. [3]
For engineering pond liners, thermal fusion welding is common for HDPE and LLDPE geomembranes. Small decorative pond liners may use different joining methods, but commercial containment projects usually need more controlled seam quality.
Construction Details
First, prepare and inspect the pond base. Second, place the geotextile underlayer if required. Third, move liner rolls or folded panels into position using suitable equipment. Avoid dragging the liner across rough ground.
Fourth, unfold the liner carefully. Workers should position it with enough slack and avoid sharp folds. Fifth, align panel overlaps and keep seam areas clean. Sixth, weld or seam the panels using the correct method for the liner material.
Seventh, place the liner edge into the anchor trench and backfill after inspection. Eighth, inspect seams, edges, penetrations, and repaired areas. Ninth, fill the pond slowly and watch for wrinkles, movement, edge pullout, or liner floating.
For projects requiring HDPE liner performance, buyers can review HDPE geomembrane solutions before confirming thickness and seam method.
| Installation Step | Main Purpose | Common Mistake |
|---|---|---|
| Base inspection | Prevent puncture and settlement | Skipping weak area repair |
| Geotextile placement | Protect liner underside | Using no cushion on rough soil |
| Liner placement | Cover pond shape | Pulling liner too tight |
| Panel overlap | Prepare for seaming | Inconsistent overlap |
| Welding / seaming | Create watertight joints | Dirty or wet seam area |
| Anchor trench | Secure liner edge | Shallow or poorly backfilled trench |
| Slow filling | Let liner settle | Filling too fast without checking movement |
Selection Table
| Installation Area | Key Control Point | Better Practice |
|---|---|---|
| Pond bottom | Smooth liner contact | Remove sharp objects and compact |
| Side slope | Liner movement | Use slack and secure edge |
| Corners | Stress control | Avoid sharp folds |
| Seams | Leak prevention | Clean, weld, and inspect |
| Pipe penetrations | Watertight detail | Use proper boots or welding details |
| Anchor trench | Edge stability | Backfill after inspection |
Seaming, Anchoring, and Leak Prevention
A liner sheet can be strong, but weak seams or poor edge anchoring can still create leakage. This is why quality control should be part of the installation plan.
Pond liner leak prevention depends on clean seams, correct overlap, suitable welding or seaming method, seam inspection, proper anchor trench design, protection from puncture, and gradual water filling. For HDPE and LLDPE geomembranes, professional welding and seam testing are strongly recommended.
Professional Explanation
EPA technical guidance on geomembrane field seams focuses on inspection techniques for field seam fabrication and explains construction quality control and construction quality assurance concepts for geomembrane seam work. [4]
This matters because many leaks happen at seams, corners, penetrations, or damaged areas. A liner roll can meet the required specification, but the finished pond may still fail if seams are not controlled.
For HDPE geomembranes, GRI GM13 provides specification guidance for smooth and textured HDPE geomembranes, including formulated sheet density and required property testing context. [5] For buyers, this means material quality and seam quality should be checked together.
Construction Details
Before seaming, the overlap area should be dry, clean, and free from dust, mud, oil, and water. Welding settings should match liner thickness, ambient temperature, wind condition, and welding equipment.
Hot wedge welding is often used for long straight seams. Extrusion welding is used for details, patches, corners, penetrations, and repairs. Small decorative pond liners may use adhesive or tape systems depending on liner material, but large commercial ponds should use project-approved seaming methods.
Anchor trenches should be placed around the pond edge. The liner is extended into the trench and backfilled after inspection. This helps prevent slipping, edge pullout, and wind uplift.
Leak prevention also depends on protection after installation. Do not walk with sharp tools on the liner. Do not place sharp stone directly on the liner. Do not allow equipment to drive on exposed liner without protection.
| Leak Risk Point | Why It Happens | Prevention Method |
|---|---|---|
| Dirty seam | Poor bonding | Clean and dry seam area |
| Wrong overlap | Weak welding area | Follow project overlap requirement |
| Poor corner fitting | Stress concentration | Use slack and correct detailing |
| Weak anchor trench | Edge movement | Proper trench depth and backfill |
| Sharp objects | Puncture | Use geotextile or clean cover soil |
| Fast water filling | Liner shift or pull | Fill gradually and inspect |
Selection Table
| Pond Type | Seam / Leak Control Focus | Buyer Checkpoint |
|---|---|---|
| Garden pond | Simple edge finish and puncture prevention | Use suitable flexible liner |
| Fish pond | Smooth surface and safe containment | Control wrinkles and seam quality |
| Irrigation pond | Large-area water retention | Use proper anchor trench |
| Wastewater pond | Chemical and leakage risk | Use HDPE and strict seam inspection |
| Reservoir | Large pressure and long seams | Use professional welding crew |
| Industrial pond | Containment risk | Request QA records and test data |
Protection Layer and Water Filling Sequence
After fitting a pond liner and finishing the seams, the liner still needs protection. Many installation problems appear after filling starts.
After laying pond liner, protect it from puncture, wind uplift, sharp backfill, equipment traffic, and sudden water pressure. Use geotextile, smooth soil, sand, or approved cover material when needed, and fill the pond gradually while checking liner settlement, wrinkles, seams, and edge anchoring.
Professional Explanation
A pond liner is a barrier material, not a structural slab. It can be damaged by stones, tools, equipment, animals, or careless backfilling. The protection plan should match the pond use.
A fish pond may need a smooth exposed surface for cleaning. An irrigation pond may need UV resistance and edge stability. An industrial pond may need chemical resistance and stricter seam control. A decorative pond may need careful folding and neat edges.
The lifetime of pond liners depends greatly on whether they are exposed or covered. [6] This is one reason buyers should decide early whether the liner will remain exposed, be covered with soil, be protected with geotextile, or be combined with concrete or stone.
Construction Details
If a cover layer is used, place it gently. Soil cover should be free from sharp stones. Gravel should not be dumped directly onto exposed liner unless the liner has suitable protection. Concrete protection should follow design details and avoid concentrated stress.
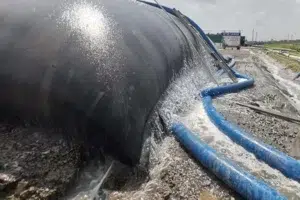
When filling the pond, start slowly. Water pressure helps the liner settle into the pond shape. If the liner moves, pulls from the edge, or forms sharp folds, workers should adjust before filling continues.
Pipe penetrations, drains, outlets, and overflow structures should be planned before installation. Random cutting after the liner is installed increases leakage risk.
| Protection Method | Best Use | Main Risk |
|---|---|---|
| Nonwoven Geotextile | Cushion under or over liner | Wrong weight may give weak protection |
| Sand Layer | Smooth cover in some projects | Can move if not contained |
| Clean Soil Cover | UV and traffic protection | Sharp stones can puncture liner |
| Gravel Layer | Drainage or ballast | Needs cushion layer if stones are sharp |
| Concrete Cover | Hard protection | Needs proper design to avoid stress |
| Exposed Liner | Easy inspection and cleaning | UV and mechanical damage risk |
Selection Table
| Pond Application | Protection Priority | Better Decision |
|---|---|---|
| Aquaculture pond | Cleaning and fish safety | Smooth exposed liner or safe cover |
| Irrigation pond | UV and edge protection | Anchor trench and UV-resistant liner |
| Wastewater pond | Chemical containment | HDPE liner and seam QA |
| Decorative pond | Neat finish and shape | Flexible liner and careful edge work |
| Reservoir | Large water pressure | Strong liner, protection, and staged filling |
| Industrial pond | Long-term containment | Full QA, test records, and protection plan |
A proper filling sequence helps the liner settle without excessive stress. It also gives the contractor time to identify problems before the pond is full.
My View
When buyers ask how to lay pond liner, I always separate small garden pond logic from engineering pond logic.
A garden pond may focus on neat fitting, flexible material, and simple edge finishing. A commercial pond needs stronger attention to subgrade preparation, liner grade, seam welding, anchor trench, geotextile protection, and inspection.
The biggest mistake is ordering liner by price first and planning installation later. That often creates wrong thickness, missing protection layer, weak seams, or poor edge fixing.
A better method is simple. Confirm pond use, water depth, soil condition, liner material, panel layout, seam method, anchor trench, and protection layer before ordering. Then the installation becomes much safer.
Conclusion
Laying pond liner requires more than spreading a sheet into a pond. A reliable installation depends on base preparation, correct fitting, clean seams, secure anchoring, liner protection, and slow water filling.
FAQs
What is the easiest way to lay pond liner?
The easiest way is to prepare a smooth pond base first, place geotextile if needed, unfold the liner carefully, leave enough slack, secure the edges, and fill the pond slowly while adjusting wrinkles.
How do I make a pond with pond liner?
To make a pond with pond liner, excavate and shape the pond, clean and compact the base, add a protective underlayer if needed, lay the liner, seam panels if required, anchor the edges, and fill the pond gradually.
What is the difference between fitting a pond liner and laying pond liner?
Fitting a pond liner focuses on shaping the liner into the pond without tension or stress. Laying pond liner refers to the full placement process, including base preparation, liner positioning, seaming, anchoring, and filling.
Do I need underlayment when installing a pond liner?
Underlayment is recommended when the soil is rough, rocky, or uneven. Nonwoven geotextile helps protect the liner from puncture and abrasion.
Can I put stones directly on pond liner?
It is risky to place sharp stones directly on pond liner. Use a protective layer such as geotextile or clean cushioning material if stone, gravel, or soil cover will be placed above the liner.
Key Takeaways
- Laying pond liner should start with soil preparation, not liner placement.
- Fitting a pond liner requires enough slack, correct panel layout, and secure edge anchoring.
- Installing a pond liner for large or commercial ponds usually requires professional seam welding and inspection.
- Geotextile protection helps reduce puncture risk when the base is rough, rocky, or unstable.
- A reliable liner supplier should help buyers confirm material type, thickness, roll size, seam method, anchor trench, protection layer, and packing before shipment.
References
- Pond liner ↩
- Geomembrane ↩
- Pond liner installation ↩
- EPA Technical Guidance Document: Inspection Techniques for Geomembrane Field Seams ↩
- GRI GM13 Standard Specification for HDPE Geomembranes ↩
- Pond liner exposure and protection ↩